What's the 101? Building a Decentralized Exchange with Solidity
Learn what a Decentralized exchange is, and how to build one with Solidity, Hardhat, Moralis, PancakeRouter, Metamask and React!
Hello Degens!
Welcome to the birth of a new series, I'm super excited to take you through this marvelous project as we look to up our skills in full-stack web 3 engineering.
This article-tutorial series is built in partnership with Gabi, AKA CleverBlocks on youtube, a Fullstack Engineer at Weave Financial.
The video code content on his channel will be broken down more explicitly via these articles, as we seek to put more emphasis on the more complex topics in smart contract engineering.
Before diving into build mode, let's have a brief overview of what decentralized exchanges are and how they work.
What is a DEX?

A decentralized exchange (DEX) is an automated medium for the user-driven exchange of digital tokens. The term user-driven indicates a lack of intermediaries; meaning, users get to transact directly with each other and can do so without the need of a third-party such as a bank, broker, or other forms of centralized authority.
Read more about DEXs here! coindesk.com/learn/2021/08/20/what-is-an-au..
How does this all work?
Well, DEXes are smart-contract powered; meaning, a piece of code living on the blockchain dictates the rules of these token swaps between users and automates transactions. On the back-end, users can also stake their funds as liquidity - meaning, "Hey, I'll put my funds down as some sort of collateral for transactions, and in return, I earn a % return on these transactions". This entire structure creates a trustless ecosystem where digital assets can be securely and consistently transacted.
A few examples of such exchanges are uniswap, sushiswap, pancakeswap, and apeswap. Each of these platforms runs on native blockchain code and features a large list of compatible tokens for swapping.
As we get deeper in this series, we'll also detail the process of implementing liquidity pools and liquidity tokens, utilizing pancakeswap's Masterchef contract, and more!
At the end of this series, we'll be covering a lot more than simple solidity; this course goes into implementing smart contract inheritance, reentrancy securities, testing with hardhat, forking the mainnet blockchain with moralis, integrating our local blockchain with MetaMask, and writing custom solidity with detailed explanations, patterns, and documentation on every feature we implement!
Ready to get started? Let's get you all set up!
Setting up a local development environment
Head over to an IDE of your choice (I'll be using VSCode, which can be downloaded at "link"), open up a terminal, and type in the following command to initialize a project.
npm init
Following the prompts should generate a package.json file that contains information about your base project. After this, make your way to hardhat.org to get started installing the hardhat suite.
Copy the following command to your terminal
npm install - save-dev hardhat
Next, type in the following to run hardhat locally
npx hardhat
This command should present you with a short list of options, we'll stick with the first "Create a basic sample project" and hit enter.
Following the remaining prompts should get you set up with a gitignore and a project root folder.
Once you're done following the prompts and creating a hardhat project, we can get to importing smart contract dependencies and setting up our contracts folder!
PancakeRouter? Why?
The first dependency we need for our DEX is a Router contract. The router contains the core logic for swapping different token types, adding and removing liquidity , and functions that tell a user how many tokens they receive for their particular input amounts. It essentially acts as an intermediary between the users and other smart contracts.
We'll be writing our function implementations based on the interface for the PancakeRouter and connecting that to the pre-existing PancakeRouter contract on the Binance Smart Chain.
We'll also take a look at some transactions on the Binance Smart Chain to closely examine live examples of swap transactions.
Go ahead and open this link to view the different versions of PancakeRouter available.
For this series, we'll be using v1 and v2 as the base interfaces for our smart contracts. (learn how interfaces work in smart contracts here…)
Next Steps
Copy the contents of the v1 and v2 files and put them into a single file in your local directory named DexRouter.sol
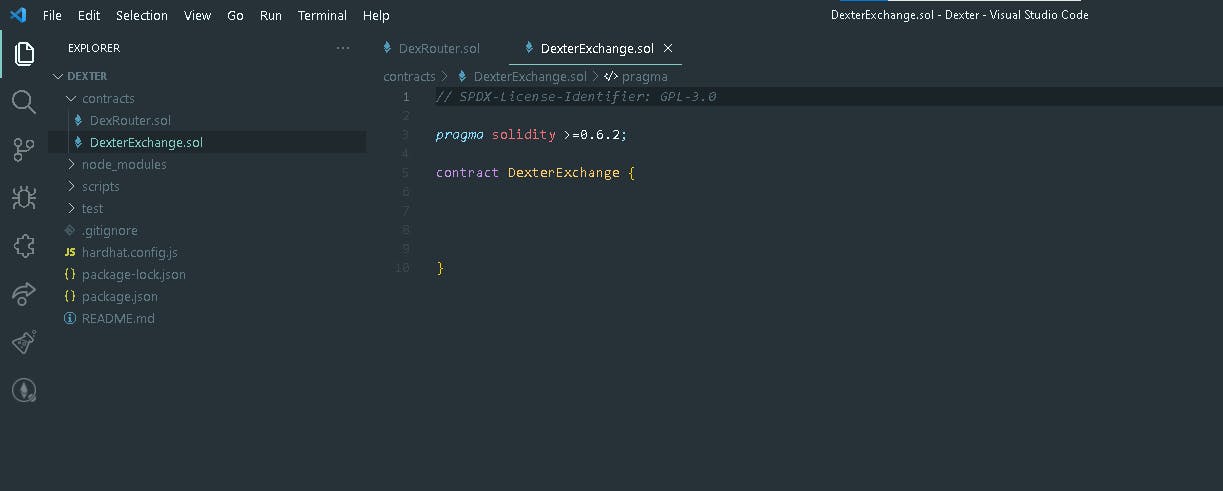
Next, you should create a new file named DexterExchange.sol and import the interfaces in DexRouter.sol…at this point, your project should look like this.

Implementing Our Constructor
Congrats! We've learned a lot today. But before we round up, we'll be putting down a few lines of code and explaining what they do.
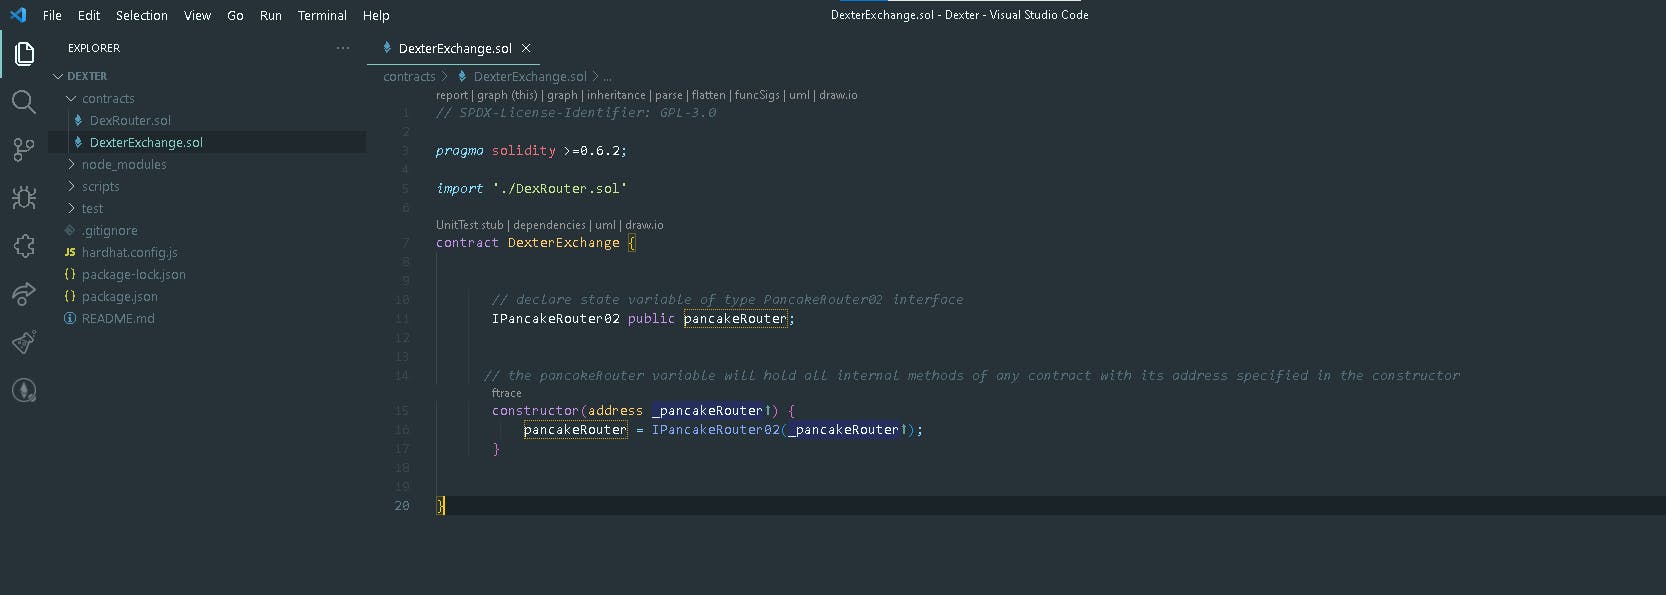
Navigate to your DexterExchange.sol and let's create our Router variable. This variable will be initialized to the address of PancakRouter currently active on the Binance Smart Chain. We'll be calling all the internal functions of the router via this variable.
...
import './DexRouter.sol'

contract DexterExchange {

       // declare state variable of type PancakeRouter02 interface
       IPancakeRouter02 public pancakeRouter;

      // the pancakeRouter variable will hold all internal methods of any contract with its      address specified in the constructor
       constructor(address _pancakeRouter) {
           pancakeRouter = IPancakeRouter02(_pancakeRouter);
       }
}

Nice work! Now when we deploy DexterExchange, we'll pass in the address of pancakeRouter currently active on the Binance Smart Chain and run our Dex transactions with it!
Closing Remarks - Next Lesson Peek

Thanks for joining us today! I truly hope you find this guide helpful for getting started on building a DEX. In the next session, we'll be writing a function to swap BNB for an exact amount of tokens provided by the user.
We'll dive deep into payable functions, the IERC20 dependency, sending tokens to a contract, and granting our pancakeRouter permissions to transact tokens sent to payable functions. We'll also cover testing our first function with hardhat, forking the binance smart chain mainnet with Hardhat, and setting up our local chain with Metamask!
If you're looking to get ahead of the class, check out Gabi's Youtube for more videos on this course.
Catch up with Gabi and Me on Twitter for weekly solidity code review and request to join our dev discord!
